What is a Data Flow?
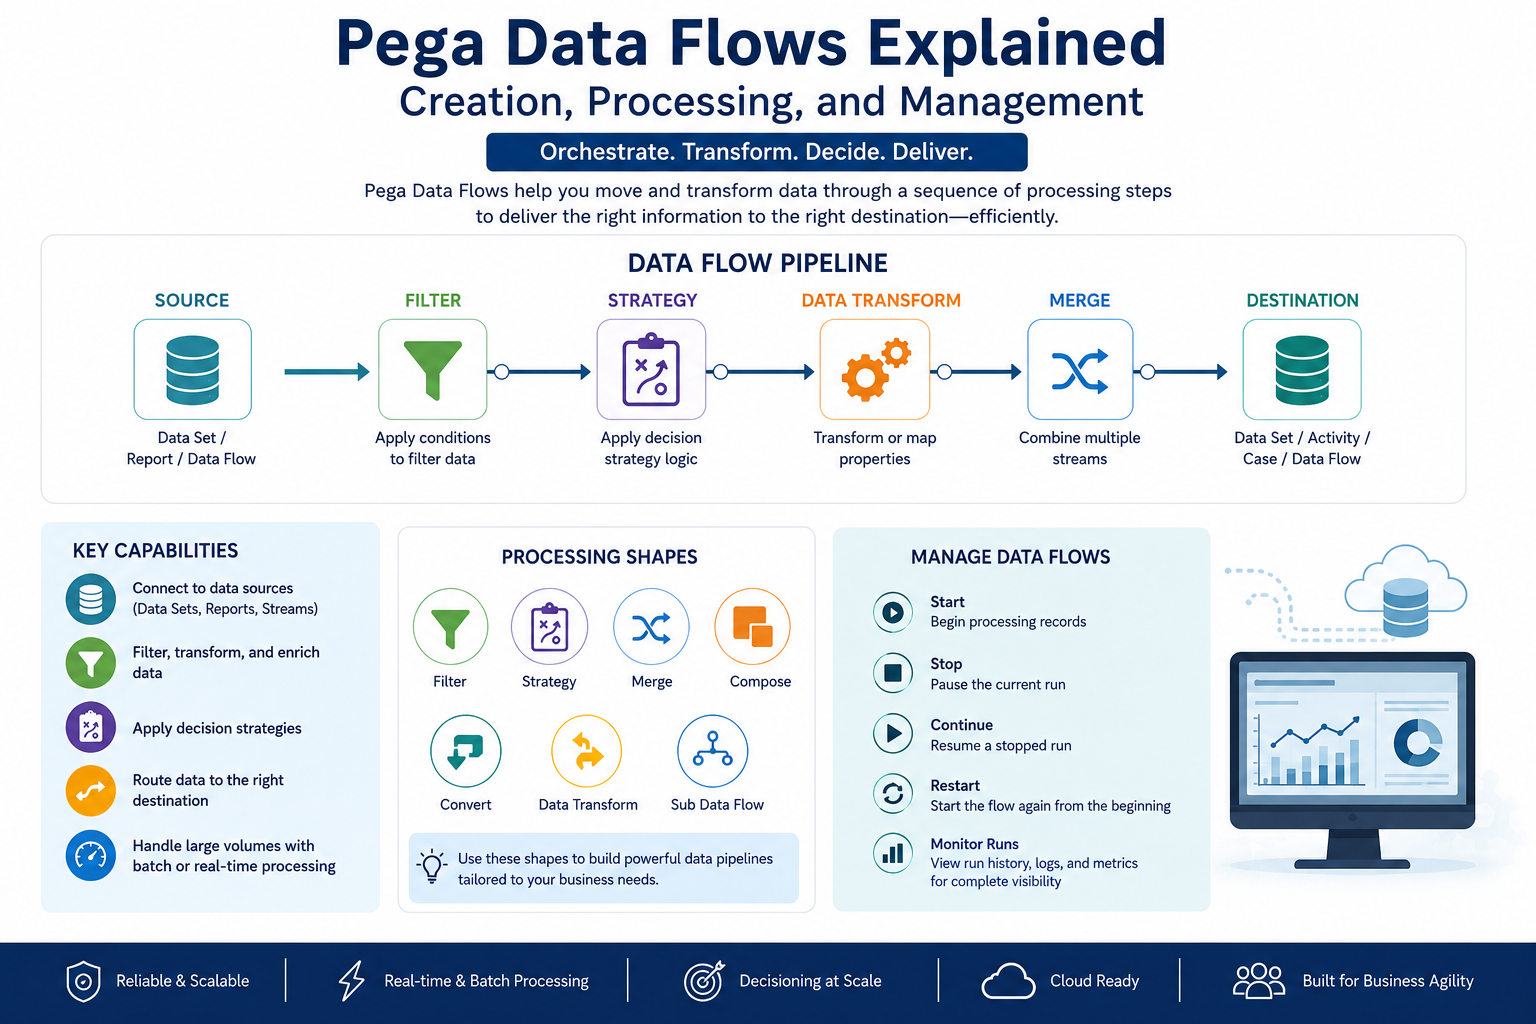
A Data Flow in Pega is a rule that defines how data should move through a sequence of processing steps, starting from a source and ending at one or more destinations. It is widely used in decisioning applications, data integration, and customer interactions.
Data Flows allow you to visually orchestrate operations like filtering, joining, enriching, and applying strategies to data. It supports both batch and real-time (streaming) processing.
You can use data flows to:
- Connect to data sets or external sources
- Apply transformations and decisions
- Route processed data to a destination (like a database or another system)
- Handle large volumes of data efficiently
Data Flows are most commonly used in Customer Decision Hub (CDH) and other decisioning use cases, but they can also support general-purpose data integration.
Steps to Create a Data Flow in Pega
Follow these steps to create a Data Flow rule:
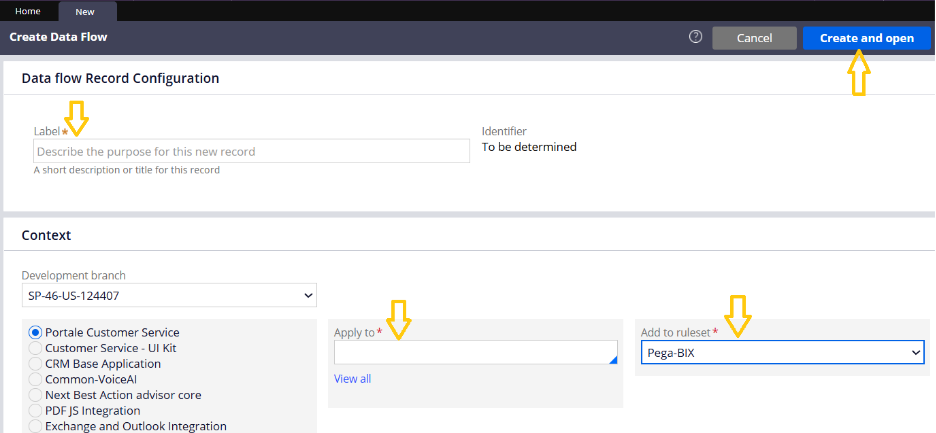
1. Navigate to Create Rule
- In the header panel of dev studio, Create → Data Model → Data Flow.
2. Choose the Class and Name
- Select the primary class and ruleset where the Data Flow should reside.
- Enter a unique and meaningful name for the rule.
- Click Create and open.
3. Add a Source Node:
Data Flows are made up of multiple components that process, transform, and enrich data as it moves through the pipeline.
Each Data Flow starts with one or more defined sources of data. When a new Data Flow is created, it includes default placeholders—an abstract source and an abstract destination—which you can later configure with actual inputs and outputs.
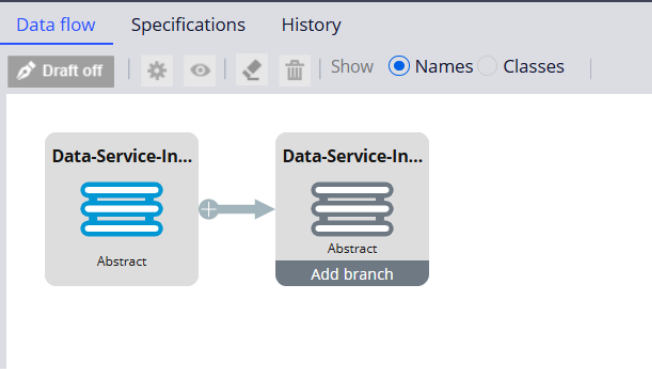
- Click the “+ Add” button or double click on the Source icon to modify.
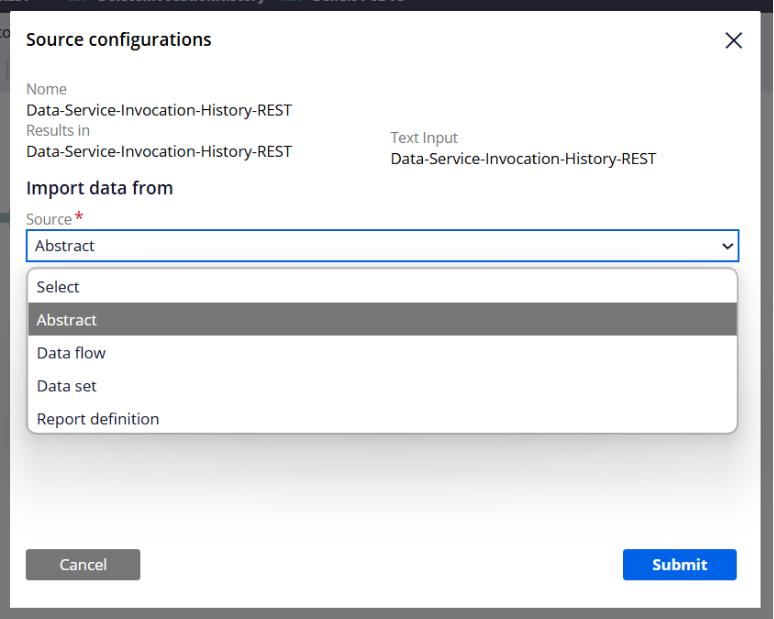
- In the Source configurations window, in the Source list, define a primary data source for the Data Flow by selecting one of the following options:
- Data Set
- Report Definition
- Data Flow
- Configure the source by selecting the appropriate data set or report and mapping fields if necessary.
4. Add Processing Shapes (Optional):
Between the source and destination, you can insert various processing steps:
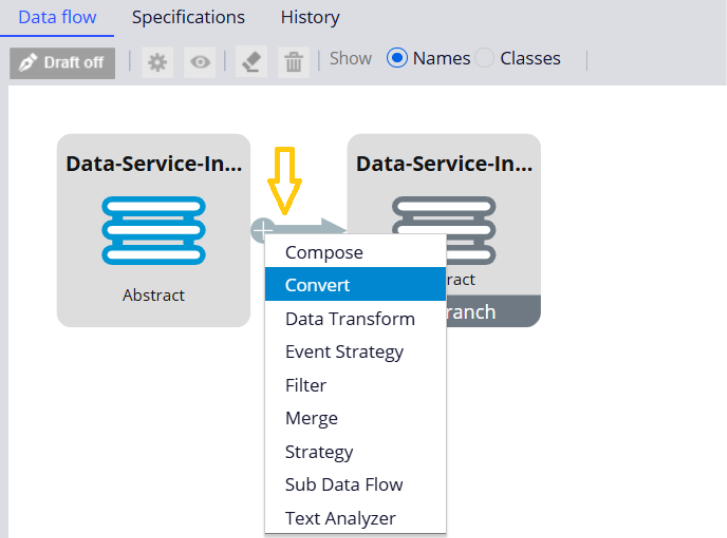
- Filter: Add conditions to filter the data (e.g., only active customers).
- Strategy: Call a decision strategy to apply decisioning logic.
- Merge: Converge multiple streams of data into one unified flow.
- Compose: Creates a complex structure like a page or pagelist by aggregating data from multiple sources into a single record.
- Convert: Transforms the class of incoming data, which is essential when the data needs to conform to a different structure or schema.
- Data Transform: Applies a Data Transform rule to manipulate or map properties, allowing for complex data transformations within the flow.
- Sub Data Flow: Embeds and runs another data flow within the current one, promoting modularity and reuse of data processing logic.
Each shape must be configured based on the fields and logic required. For example:
If you added data transform, you will get below screen
If you add filter, you have to configure the below screen,
5. Add a Destination Node:
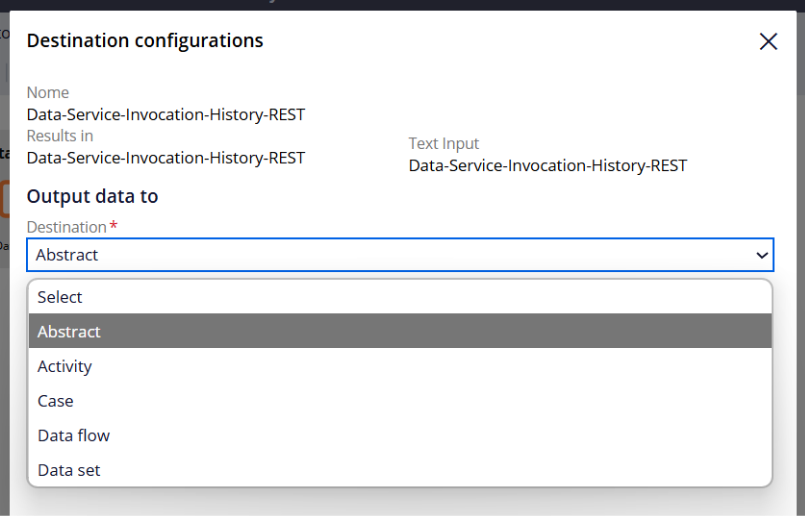
Double click the Destination source. Select from options like:
- Data Set (e.g., write to a database table)
- Activity
- Case Type
- Data Flow
Configure the destination by selecting the data set or rule and mapping output fields.
6. Save and Test
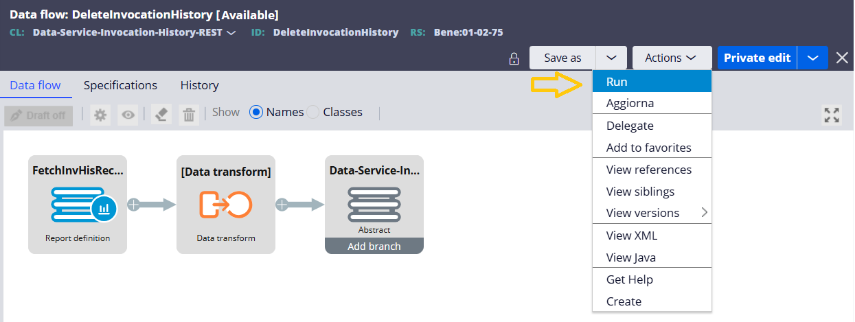
- Click Save and Check in the rule.
Testing Data Flow:
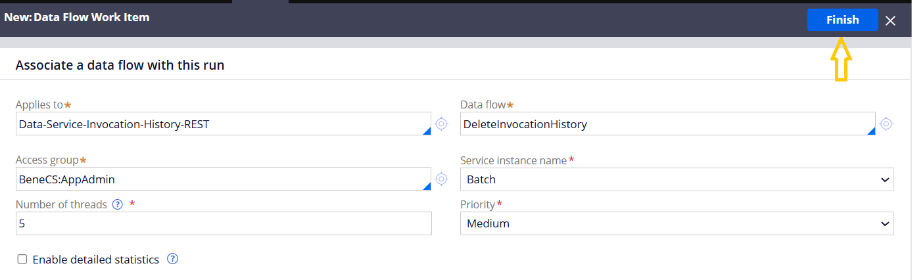
- To test, click Actions → Run.
- Data Flow Work Item window for the tested Data Flow. Click Submit to create a new Data Flow test run.
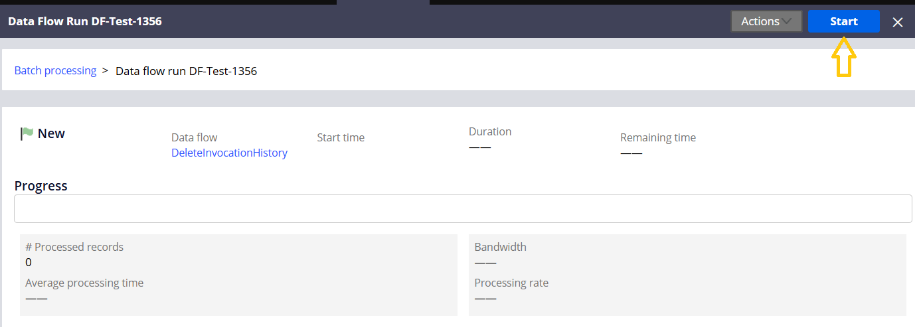
- Click Start to start the run
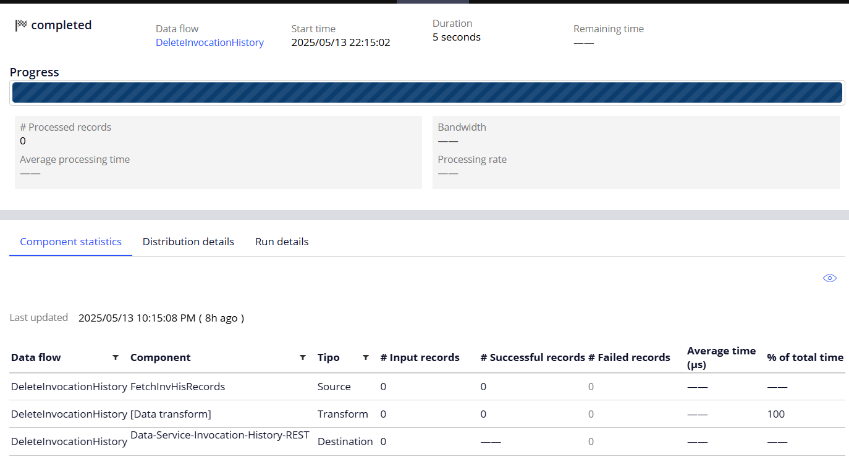
After completion of the run, you will get the below screen with all the run details like number of records processed, successful records count, failed records count and time taken to process the records
Managing Data Flows in Pega
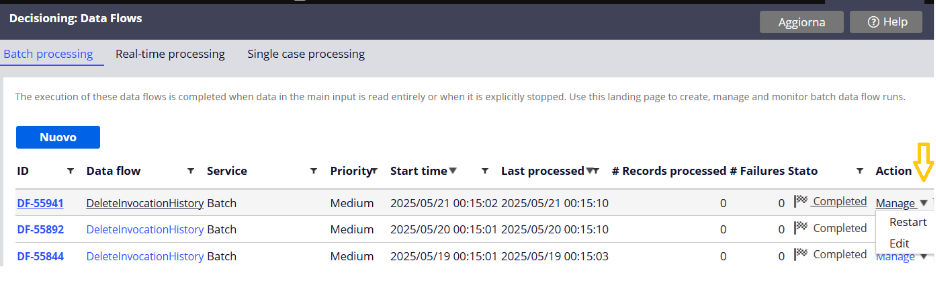
You can start, stop, continue, or restart Data Flows in Dev Studio to control how records are processed.
Steps to Manage Data Flows:
- In the header of dev studio, click Configure → Decisioning → Decisions → Data Flows.
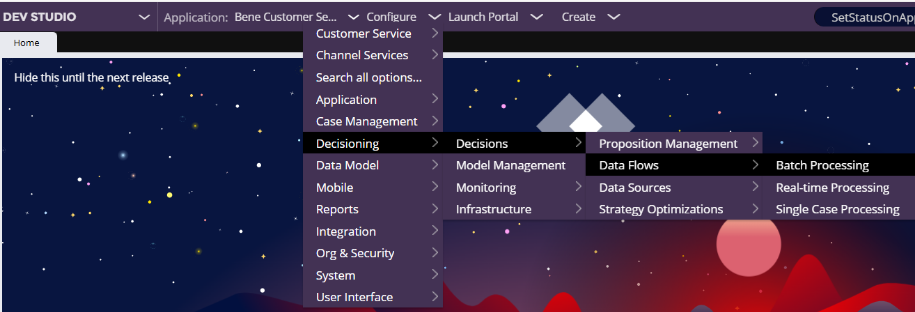
- Select the Type of Data Flow
- Batch processing – For Data Flows with non-stream data sets
- Real-time processing – For streaming data sets (e.g., Kafka, Stream, Kinesis)
- Single case processing – For flows triggered per case using DataFlow-Execute
- Manage the Data Flow
- In the Action column, click Manage
- Choose from available actions: Start, Stop, Continue, Restart
- Actions depend on the current run status (e.g., you can only restart a “Completed” run)
- Optional: Click on the Run ID to see detailed logs and execution metrics.